An email autoresponder or provider is a 3rd party tool that can automatically email your contacts. Assuming you have an account with a 3rd party provider, you can make Launch OS send over new leads collected on any of your web pages (e.g. a lead capture page, webinar page, or an order form).
IMPORTANT: Before you do the steps below, please make sure you have finished setting up the Launch OS Integrations.
Step 1: Go to the page you want to integrate your email provider with.
Go to the app you want to use (Pages, Funnels or Sites app) then click a page or campaign you'll work on.
Step 2: Select Your Email Provider and Choose a Campaign.
⇨ Click the [gear] icon to access page settings.
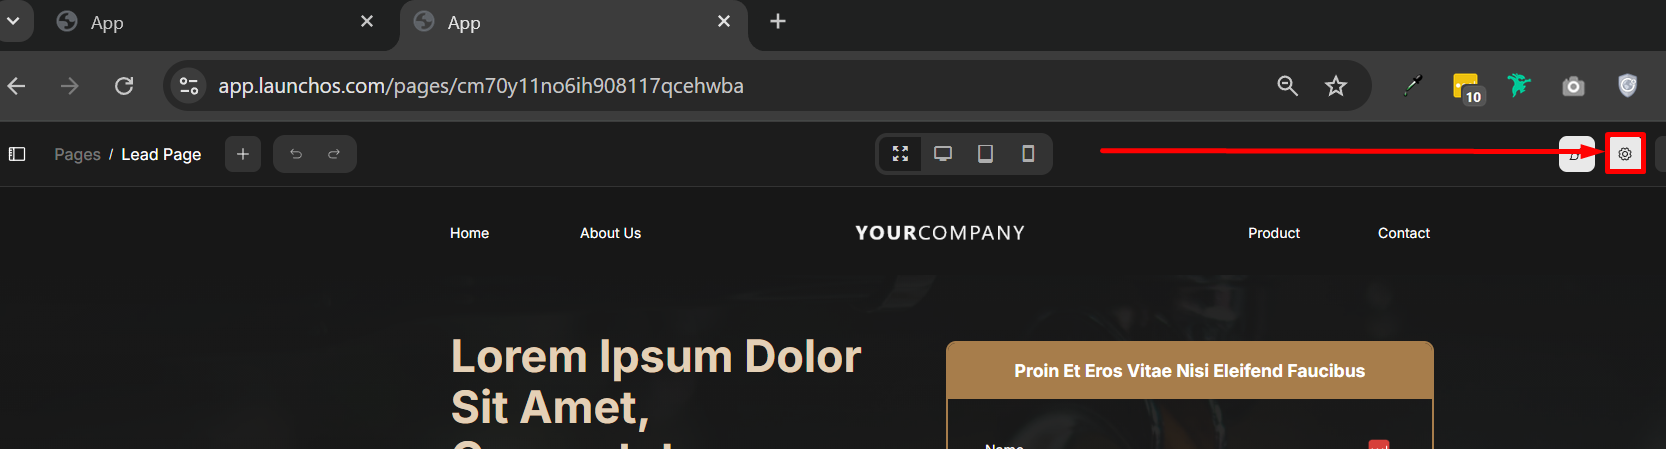
⇨ Click the "Connections" tab then click the "Set Campaign Settings" button. Next, select the CRM you integrated earlier then select a campaign where you want the contacts to be added.
Note: There should be an existing campaign (or you can create a new one) in your CRM. Depending on the CRM, a "campaign" can be an audience segment, list, form, tag, campaign, etc.

Step 3: Check the Funnel Setup
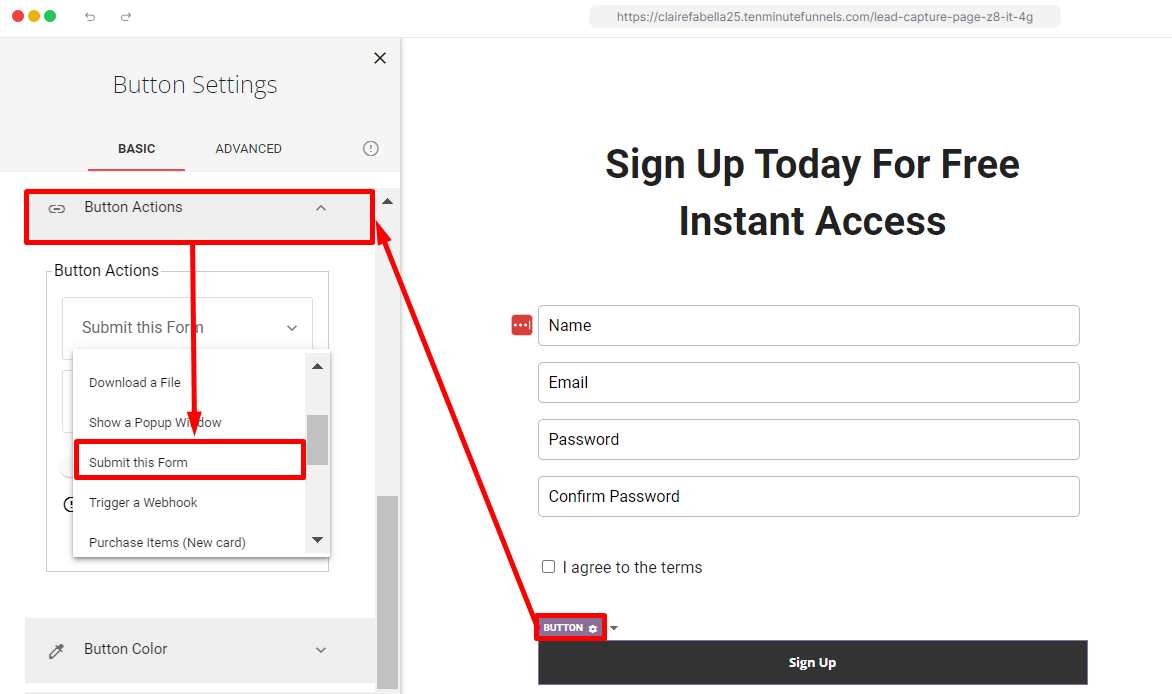
#1 The CTA button action on the Lead Page should be "submit a form"
Click the button on the page, and select Button Actions from the settings sidebar, on the drop-down select "Submit this form"
Selecting this option ensures that all the information entered on the form fields (e.g. name and email address) are submitted to the autoresponder after the button is clicked.
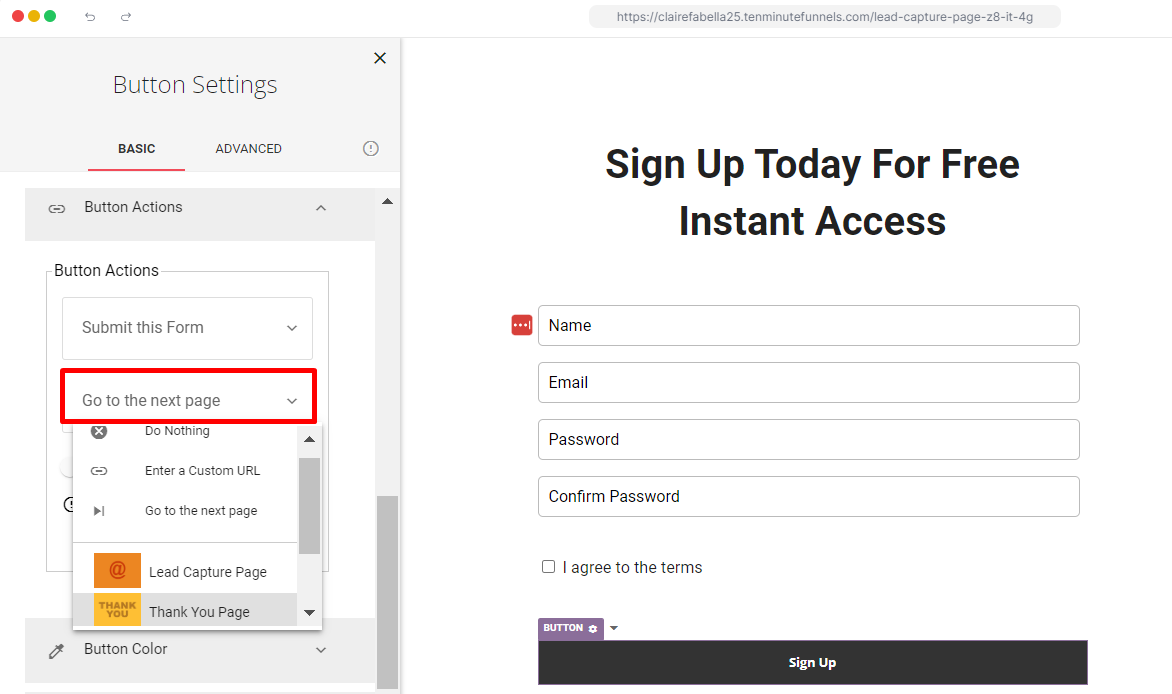
#2 There should be a Thank You Page (or another page) connected to the Lead Page
After visitors click the button to submit the information in the Lead Page, they should also be redirected to another page informing them that their sign-up was successful.
If you selected the Simple Lead Capture Funnel as you created the funnel, you should already have a Thank You Page in your funnel. If you haven't created a lead funnel yet, here is a complete guide on how to create a simple lead capture funnel.
If you already have a page built and you just want to add a lead capture form, here are some helpful references: Form, Form Field.
In the Button Actions, below "Submit this Form," choose the next action:
-
Select Enter a Custom URL if the Thank You Page or next page is not located in the same funnel as the lead capture page.
-
Select Go to Next Page if you want to redirect it to the next page in the funnel.
-
Click a specific page in the dropdown (e.g. Thank You Page as seen in the image below).
#3 The page and the funnel should be published.
Once you've done all the steps above, you can publish your page and then the funnel to test if it works.
To publish the page, click the [Publish] button at the upper-right corner of the page editor then click the link in the pop-up to view the page.
To publish the funnel, go first to the funnel by clicking the funnel name beside the page name (see image below).
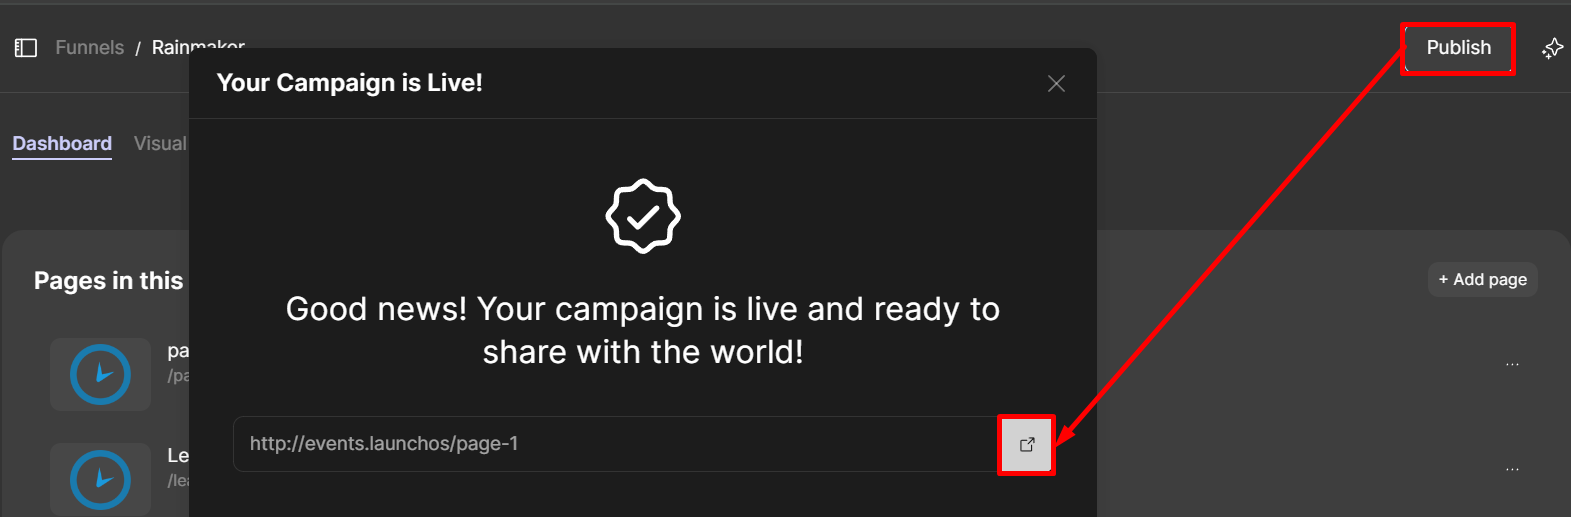
Click the Publish button then click the [Visit Page] icon to test the funnel.
Step 4: Test the Funnel
To test your funnel, fill in the required information on the published lead capture page, and then click the button.
To know that you've set it up correctly:
-
After clicking the button, you should be redirected to the next page (e.g., Thank You Page).
-
When you go to your email provider, you should see the details you entered in the campaign list you assigned your funnel to.
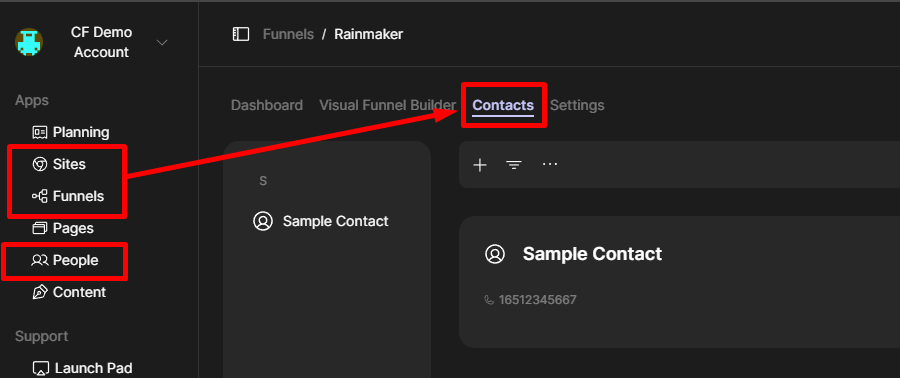
Aside from sending over the leads to your email provider, they will also be saved in Launch OS and can be viewed in:
-
Funnels > Contacts tab
-
Sites > Contacts tab
-
People > Contacts tab